How to Setup a React App from Scratch?

Note: This is article is written for demonstration purposes. Not ready for 🚀.
When learning React a developer can feel blessed with so many boilerplate/starter-kits out there such that they let the learner focus on more on the fundamentals of React API rather than setting up a project from scratch. However, IMO one should create a react app with bare minimals or scratch that, just for the sake of learning tools. Tools do help you. They are similar that are being used in various starter-kits but if you have no knowledge of these tools, how are you going to scale an application or tweak configuration according to your own settings?
These tools I am talking about are common and essential for React Application development.
In this project, I am going to build a bare minimal React app, let’s a hello world example but I will be focusing more on tooling and other essentials when building a React application.
Pre-Requisites
Before reading rest of the document, I am assume you are familiar with:
- Git
- Node.js (installed)
- npm
- What web apps are?
- What is React? (just the introduction)
- Modern JavaScript (not necesary but good for if you decided to play with React for the rest of your weekend)
To fill the gaps, I highly recommend you take a glimpse of React Express.
Step 1: Initial Setup
Make sure you are inside a directory where you want to build your react app.
mkdir react-app-example && cd $_Then run npm init or yarn init. I am sticking with npm. Also, my current npm version is:
npm -v
5.5.1
Do make sure you are using Node.js version >= 6.
This is the directory structure I have for my initial setup:

I will start by taking a look into each file mentioned above in the directory structure of our application.
.gitignore
This file prevents uploading OS generated files such as (.DSStore), nodemodules folder and other things that you don’t want to commit to your VSC such as Github.
package.json
Next I am going to update my package.json and other meta information that you'd want before deploying or committing on a VCS. This file is the only result of following command from terminal:
npm init --yesCurrently, the file looks like below but it will get updates as soon as we pass the initial setup step.
{
  "name": "react-app-bootsrapping",
  "version": "0.1.0",
  "description": "How to Build a React from Scratch?",
  "main": "index.js",
  "scripts": {
    "test": "echo \"Error: no test specified\" && exit 1"
  },
  "keywords": [],
  "author": "Your Name <you email> (https://example.com/)",
  "license": "MIT"
}
Step 2: ESLint & Prettier
Create .eslintrc & eslintignore.
# installing eslint essential packages for development (as DevDependencies)
npm install -D eslint@3.19.0 eslint-config-airbnb@15.0.1
eslint-config-react eslint-loader eslint-plugin-import
eslint-plugin-jsx-a11y@5.0.3 eslint-plugin-react
Prettier
Next I’ll recommend to use Prettier. This will save a lot of time formatting code. It might be opinionated but it is good sometimes to have an opinion that benefit all of us.
To setup prettier for your project, you need:
npm i -D prettier eslint-config-prettier eslint-plugin-prettierThe .eslintrc configuration now should be like this:
{
  "extends": ["airbnb", "prettier", "prettier/react"],
  "plugins": ["prettier"],
  "parser": "babel-eslint",
  "parserOptions": {
    "ecmaVersion": 2016,
    "sourceType": "module",
    "ecmaFeatures": {
      "jsx": true
    }
  },
  "env": {
    "es6": true,
    "browser": true,
    "node": true
  }
}
To run lint our files manually later on, we can add an npm script in our package.json under "scripts":
"scripts": {
  "lint": "eslint **/*.{js,jsx} --quiet"
}
Step 3: Configuring Babel
In short: Babel is a transpiler/compiler that compiles ES6 code to ES5 for most of the browsers to understand.
Essential packages to setup Babel in our project:
npm i -D babel-core babel-eslint babel-loader
babel-plugin-dynamic-import-node
babel-plugin-syntax-dynamic-import
babel-plugin-transform-class-properties
babel-plugin-transform-es2015-modules-commonjs
babel-preset-env babel-preset-react

# after above commmand runs successfuly
npm i -S babel-plugin-dynamic-import-webpack
babel-plugin-transform-decorators-legacy
Next, configure .babelrc:
{
  "presets": [
    "react",
    [
      "env",
      {
        "targets": {
          "browsers": "last 2 versions"
        },
        "loose": true,
        "modules": false
      }
    ]
  ],
  "plugins": ["babel-plugin-transform-class-properties"],
  "env": {
    "test": {
      "plugins": ["babel-plugin-transform-es2015-modules-commonjs"]
    }
  }
}
Following along so far? If having any trouble, do check this code repository on Github.
Step 4: Configure Webpack
First let’s install essential packages:
npm i -S webpackNow append webpack.config.js:
const path = require('path');

module.exports = {
  context: __dirname,
  entry: './src/App.jsx',
  devtool: 'cheap-eval-source-map',
  output: {
    path: path.join(__dirname, 'public'),
    filename: 'bundle.js'
  },
  resolve: {
    extensions: ['.js', '.jsx', '.json']
  },
  stats: {
    colors: true,
    reasons: true,
    chunks: true
  },
  module: {
    rules: [
      {
        test: /\.jsx?$/,
        loader: 'babel-loader'
      }
    ]
  }
};
And do not forget to append npm scripts with two new scripts build and watch:
"scripts": {
    "build": "webpack",
    "lint": "eslint **/*.{js,jsx} --quiet",
    "watch": "webpack --watch"
}
Step 5: .editorconfig & .eslintignore
This file enforces code formatting rules on most editors for consistency. For more information visit here.
# editorconfig.org
root = true

[*]
indent_style = tab
indent_size = 2
end_of_line = lf
charset = utf-8
insert_final_newline = true
trim_trailing_whitespace = true
One more thing I forgot to mention in Step 2 is to add rules to .eslintignore such that we can exclude bundle.js which is a result of webpack bundling and node_modules.
public/
node_modules/
Step 7: Adding React and ReactDOM
To test our bare minimum configuration we are going to setup a timy react application to see if everyting works.
First I’d recommend to create two new directories in root of your project: public (where index.html lies as well as the outpt generated from webpack configuration )and src (where we wil write out tiny app code).
# install minimum required packages to instatiate a react application
npm i -S react react-dom
Please note that I am using react@15.6.1 version. I do not want to break things for any hassle and I am sure neither do you. To make sure you have this application working, I'd recommend you to run following command instead of above:
npm i -S react@15.6.1 react-dom@15.6.1Now make sure your public/index.html is similar to this:
<!DOCTYPE html>
<html lang="en">
<head>
<meta charset="UTF-8" />
<title>React App</title>
</head>
<body>
<div id="app"></div>
<script src="bundle.js"></script>
</body>
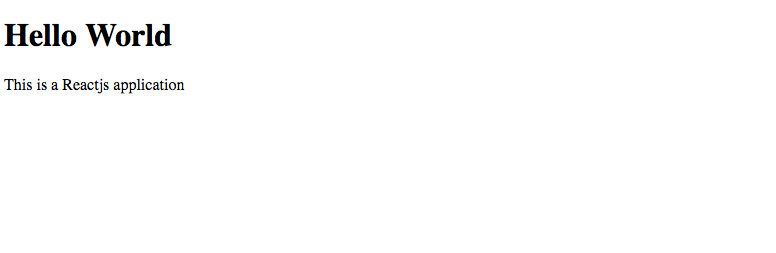
</html>Inside src/App.jsx write the following code:
import React from 'react';
import { render } from 'react-dom';

const App = () => (
  <div>
    <h1>Hello World</h1>
    <p>This is a Reactjs application</p>
  </div>
);

render(<App />, document.getElementById('app'));
Now run from terminal:
npm run buildThis command will generate public/bundle.js that will act as the single source of truth for all of your JavaScript.
Now traverse to your project directory in a file manager and open index.html in your browser. You will see a similar output depending on the input you wrote inside App.jsx file.
Note: Many starter-kits follow conventions of .js instead of .jsx. I wanted to demonstrate that you can use both and as per my knowledge, since we are following AirBnB configuration, they follow .jsx file naming convention.
On running npm run build you can see the following success message in your terminal. Any error(s) while packaging, webpack will highlight them in red colour.
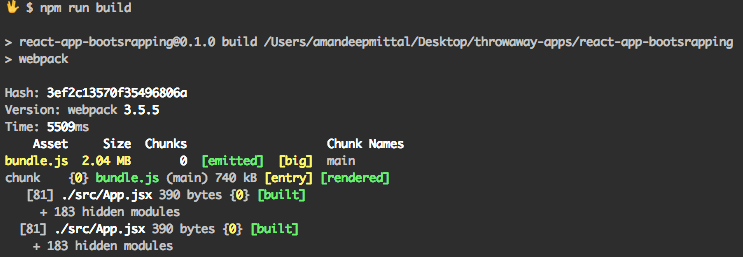
Great! You have just created your first Hello World React App with good amount of configuration.
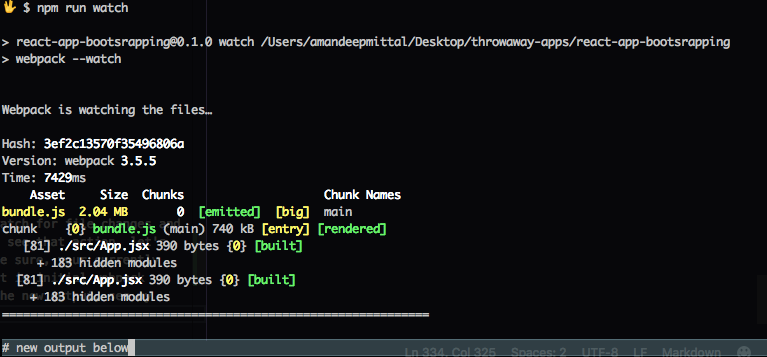
If you want to play further with your react app, I’d recommend using npm run watch instead of build since the former command will watch for any changes made.
Step 8: Linting Your Code
If you have followed along and done exactly what is written, you will see no errors on running npm run lint in your terminal. However, this is a tedious process to run for linting every time you make amendments in your code base. I highly recommend, to configure your eslint with the webpack configuration just by adding this rule in webpack.config.js:
module: {
  rules: [
    // new rule we are adding right now
    {
      enforce: 'pre',
      test: /\.jsx?$/,
      loader: 'eslint-loader',
      exclude: '/node_modules/'
    },
    // rule we added earlier
    {
      test: /\.jsx?$/,
      loader: 'babel-loader'
    }
  ];
}
Now run npm run watch for Webpack to watch for file changes and linting will be done along with that. To see that action, let's make a change to our App.jsx file. Make sure, your currently running the watch command and your output is initial webpack output. To make a distinction between the new output, see my terminal:
Now I am going to break my code just for linting errors:
<h1>Hello, World</h1>
  // linting error in the line below
    <h2>This is sub header
    <p>This is a Reactjs application</p>
  </div>;
My terminal now looks like this:
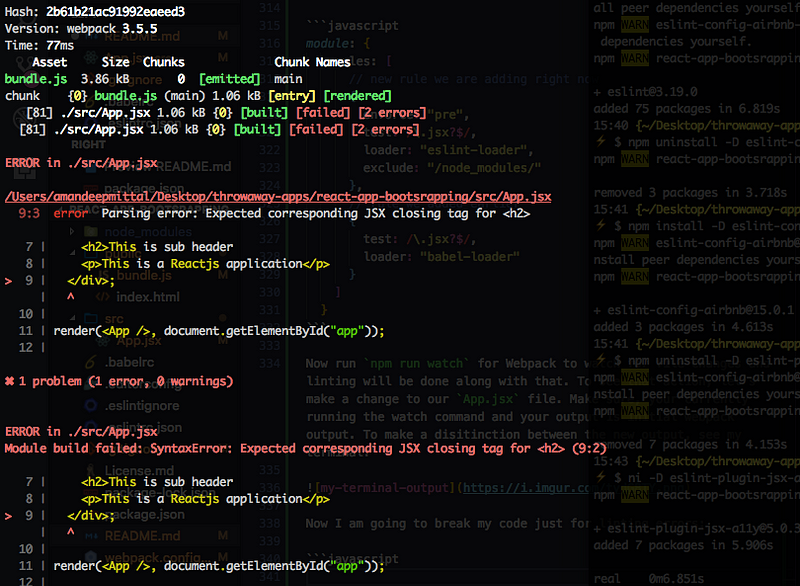
Until you do not solve this error, the output will not be shown in the browser.
Now that you understand or have an idea of what steps are covered by a React Starter Kit I think you are ready to pick your favorite kit and start developing your next React app. I have demonstrated only bare minimum configuration of tools such as Babel, ESLint and Webpack. There are things like Hot Module Reloading(HMR) and Webpack Dev Server that saves a good amount of developer’s time period. Also, do not forget the deployment part. That’s the last and most essential part in the lifecycle of a web application.
Below I am listing resources that will help you go in-depth of tools such as webpack and some starter-kits.
Some React Starter Kits worth looking at:
Different kits cover different scope for applications. If you want to share any React resource that you think will be useful for someone like me who is getting started in the React Development Ecosystem, please mention it in the comment below.
You can find all of the above over this Github repo.