How to Build a Web App with React Native
The power of React Native as a framework continues to increase over time. For those who are unfamiliar, React Native is a cross-platform framework developed by Facebook. It’s open source and lets you build mobile applications using JavaScript as its core.
Thanks to Nicolas Gallagher’s open source project React Native for Web, now you can use React Native API components to build a web application that uses React DOM as its core. React Native already makes it convenient to write mobile apps for two platforms: iOS and Android. And now the web is slowly entering the picture. 🤩
Sounds interesting, right? In this tutorial, that’s what we’re going to do. We’re going to walk through, step-by-step, the process of integrating a Web App that uses React Native.
Requirements
- NodeJS version
>= 8.x.xand npm/yarn - Basic understanding of ES6 JavaScript features, ReactJS, and React Native will be helpful.
Getting Started: Create a React App
To start, go to your terminal and install the following command line tools. The first one will help you scaffold a React app, and the other one will run a React Native app:
npm install -g create-react-app expoNote: You might have to use
sudoin front of the above command ifnpmpermissions are not set and everything is the default.
After the installation, run the following command from a terminal window in order to generate a new React project:
create-react-app reactnativeweb-demoThis will generate a new directory. A good thing about this project generating ( official) tool is that it already includes built-in support for aliasing react-native-web to react-native.
The next step is to install a couple more dependencies to make this project work like we want it to. Make sure you traverse inside the newly created project directory and then run the below command:
yarn add --dev babel-plugin-module-resolverThe babel plugin babel-plugin-module-resolver will help you resolve your project modules when compiling with Babel. React Native uses the Babel compiler internally. Now install the most essential dependencies, without which this project would not run.
yarn add react-native expo react-native-webThe last step, for now, is to create a file called .babelrc at the root of the project with the following snippet:
{
  "plugins": [
    [
      "module-resolver",
      {
        "alias": {
          "^react-native$": "react-native-web"
        }
      }
    ]
  ]
}
Note: If you want to configure a
react-native-webapp project where you use your ownwebpackconfiguration, or need to write modules withjest, or if you’re a fan offlow, you should take a look at this link in order to make things work properly.
Running on the Web
Before we proceed to build a demo application, let’s see if the current configuration works or not. Open your src/App.js file and replace the content inside it with the following snippet of code:
import React from 'react';
import { StyleSheet, Text, View } from 'react-native';

class App extends React.Component {
  render() {
    return (
      <View>
        <Text style={styles.text}>Hello, world!</Text>
      </View>
    );
  }
}

const styles = StyleSheet.create({
  text: {
    fontWeight: 'bold',
    fontSize: 30
  }
});

export default App;
Here, we’re basically using the react-native API build UI components for the web application. Do note that, in React Native terms, View is the equivalent of a div in HTML and text is the equivalent of p or a span. There are a lot of similarities between the APIs of the mobile UI and the Web, but there are important differences to understand and keep in mind.
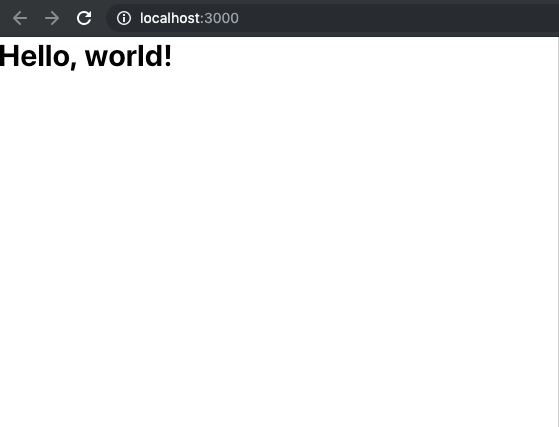
To run the application, go to a terminal window and write npm start and execute it. In a browser window, on visiting URL http://localhost:3000 you will get the following result.

To verify that it’s building a DOM tree to manage nodes, you can open up developer tools in your web browser and go to inspect > Elements to see the ids and classes with a random string created inside a typical React app.

Similar to a React app, the App component remains the entry point of our application. Also, the index.js file remains unchanged, so it’s very important to note how easy it is to integrate a mobile framework and a web library.
About Styling
React Native relies on JavaScript when it comes to styling component or UI elements. React Native for Web implements the React Native style API. To define a style, it’s the same in a React Native app. All you have to do is declare a StyleSheet object, inside of which each styled property needs to be defined.
In our App.js file, we’re implementing this. Take a look:
const styles = StyleSheet.create({
  text: {
    fontWeight: 'bold',
    fontSize: 30
  }
});
Some of the web units like rem and em are not supported by React Native, so the suggestion here is to avoid using them.
Listing Elements
Rendering a list in React Native Web is similar to React Native for mobile. Let’s add some mockup data and use FlatList container to display the content. Modify App.js as shown below:
import React from 'react';
import { StyleSheet, Text, View, FlatList } from 'react-native';

class App extends React.Component {
  state = {
    StarWarsAPI: [
      {
        id: 1,
        name: 'Luke Skywalker'
      },
      {
        id: 2,
        name: 'C-3PO'
      },
      {
        id: 3,
        name: 'R2-D2'
      }
    ]
  };

  _keyExtractor = (item, index) => item.id;

  _renderItem = ({ item }) => (
    <View style={styles.listContainer}>
      <Text style={styles.listItem}>{item.name}</Text>
    </View>
  );

  render() {
    return (
      <View style={styles.container}>
        <Text style={styles.text}>Hello, world!</Text>
        <FlatList
          data={this.state.StarWarsAPI}
          keyExtractor={this._keyExtractor}
          renderItem={this._renderItem}
        />
      </View>
    );
  }
}

const styles = StyleSheet.create({
  container: {
    padding: 10,
    flex: 1
  },
  text: {
    fontWeight: 'bold',
    fontSize: 30
  },
  listContainer: {
    paddingTop: 20
  },
  listItem: {
    fontSize: 20
  }
});

export default App;
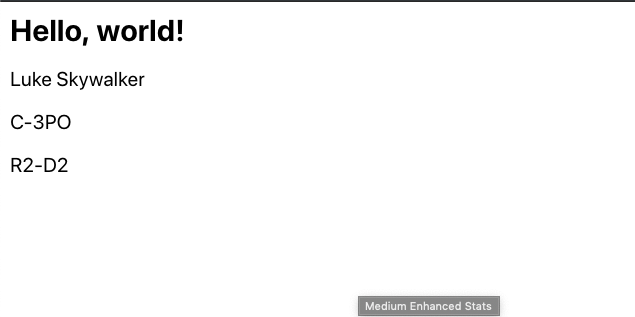
If you run it in the browser, you’ll get the following result.

Conclusion
So far, you’ve got the hang of the React Native for Web module. You learned how to integrate React Native as a component API and make it run in a web browser. React Native for Web does not support every React Native component API. It lacks support for Modal, WebView, Slider. Also some modules like CameraRoll and ImageStore are not completely supported, which is understandable but might be helpful if available in some use cases.
Individuals and companies who love to work with React Native are working to close the gap between the web and the framework itself. This will allow building multi-platform applications. Organizations like Expo are currently working on their own fork of React Native Web that might support many more APIs and components than React Native for Web, so the future seems bright in that sense. They will be releasing Expo web with Expo SDK 33.x.x, so look out for that.
Some other resources worth looking at:
- Create React Native Web App is a CLI tool that manages your app better than the manual integration we did in this tutorial.
- React Native for Web is the module we used in this post.
All the code used in this tutorial can be found in the GitHub repository below.
amandeepmittal/reactnativeweb-demo