Accessing Geo-location and App Permissions in React Native and Expo

In web, Geolocation is provided as an API that has different methods to use in a web application. Similarly, React Native takes advantage of this API and is available as polyfills. Geolocation is a must have feature to implement in a mobile app. Few of the famous mobile apps that use it for more than 90% in terms of usage are Uber, Google Maps, etc. In this article, I will show how to integrate the Geolocation API in a React Native app in two ways. Using Expo and using react-native-cli. Along with that, I am going to implement a real time feature that is commonly used with these types of applications. Asking user permissions. Permissions in react-native-cli can be a bit tricky but after reading this article, it won't be tricky to you as much.
Getting Started With Expo
For this purpose, I am using expo-cli. Follow the below commands to set up an Expo project and get started.
npm install -g expo-cli

expo-cli init find-me

# select blank template & traverse into a newly created directory

npm run ios

# for Window users, run

npm run android
You will be welcomed with a default screen. We will start here. First, edit the App.js.
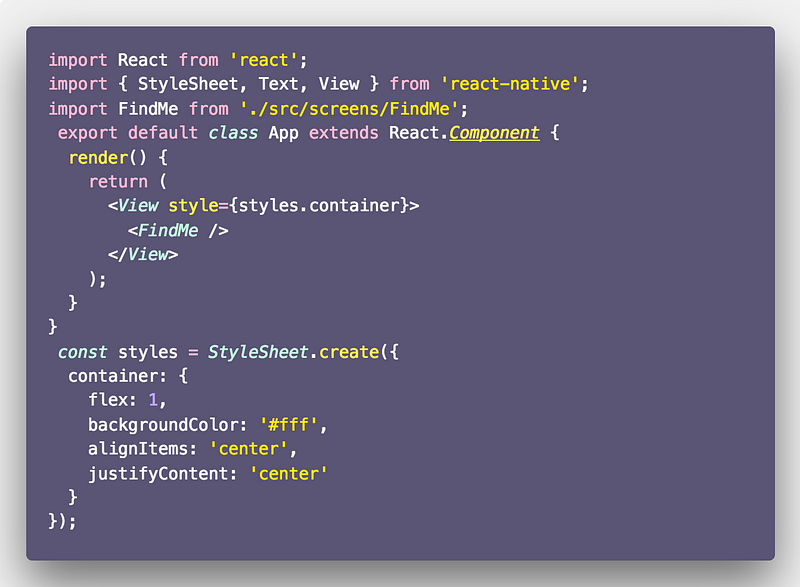
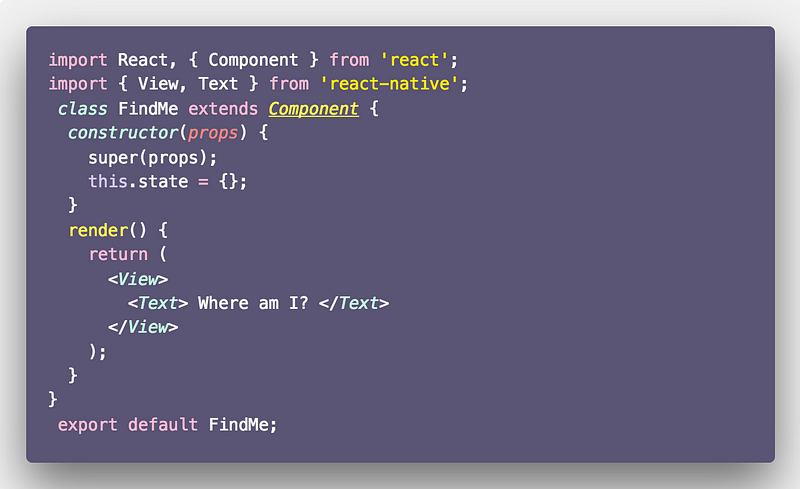
Create a new file for the FindMe component at src -> screens -> FindMe -> index.js. Inside this file, we will just display a text.
Here is how our app looks so far.

Accessing Geolocation API
The Geolocation API exists as a global object called navigator object in React Native, just like the web. It is accessible via navigator.geolocation in our source code and there is no need to import it.
For our demonstration purposes, we will be using getCurrentPosition method from the geolocation API. This method allows a mobile app to request a user's location and accepts three parameters: success callback, error callback and a configuration object in the last.
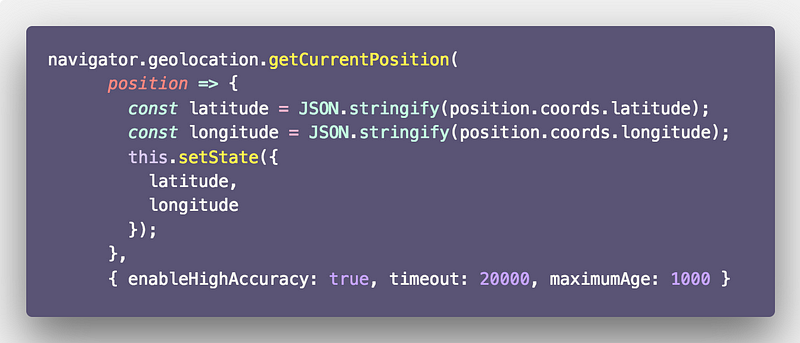
The first callback has a position argument that is an object with the following properties.
{
  "timestamp": 1533729980953.91
  "coords": {
    "accuracy": 5,
    "altitude": 0,
    "altitudeAccuracy": -1,
    "heading": -1,
    "latitude": 37.785834,
    "longitude": -122.406417,
    "speed": -1
  }
}
Now, implement this in our FindMe component.
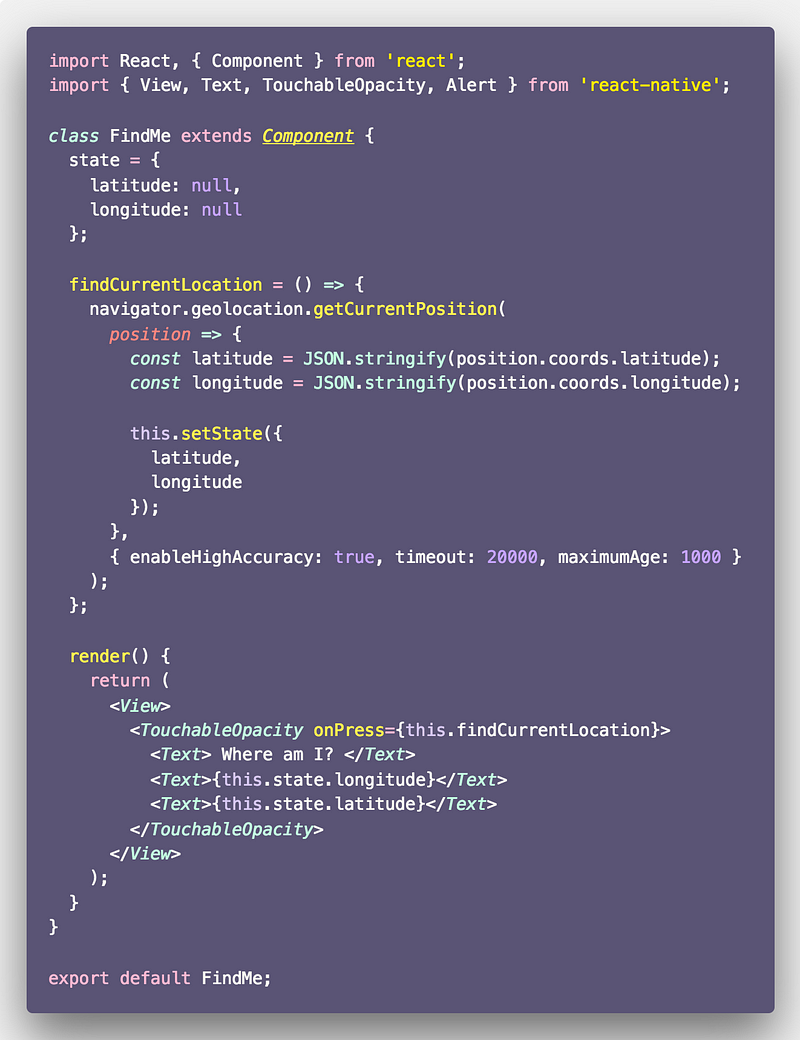
We start be importing TouchableOpcaity. It is a wrapper that responds accurately to user touches. In a mobile app, you will be making use of them. Think of it as a button in a web application. This newly imported wrapper accepts an onPress prop that is going to trigger the function defined as in the value, in our case findCurrentLocation.
findCurrentLocation holds the logic of fetching a user's location. We are also using the local state to display coordinates from the data provided to us by position object. The text Where Am I now becomes clickable.

That’s it for the app part. Now let us see how to add permissions to the same application.
Using Expo Permissions
Requesting to access a user’s information whether it is location or any other sensitive information on the device, it is your job as the developer to ask for the permissions first. It is one time process, both when developing the application and when the user is using the application. Most permissions are asked when the user installs the application run it for the first time.
For us, Expo has integrated all the permission API we need for this demo app or any other app you are building using Expo. This API has different methods for device types of permissions to grant for. Such as location, camera, audio recording, contacts, camera roll, calendar, reminders (for ios only) and notifications. We are going to use Location.
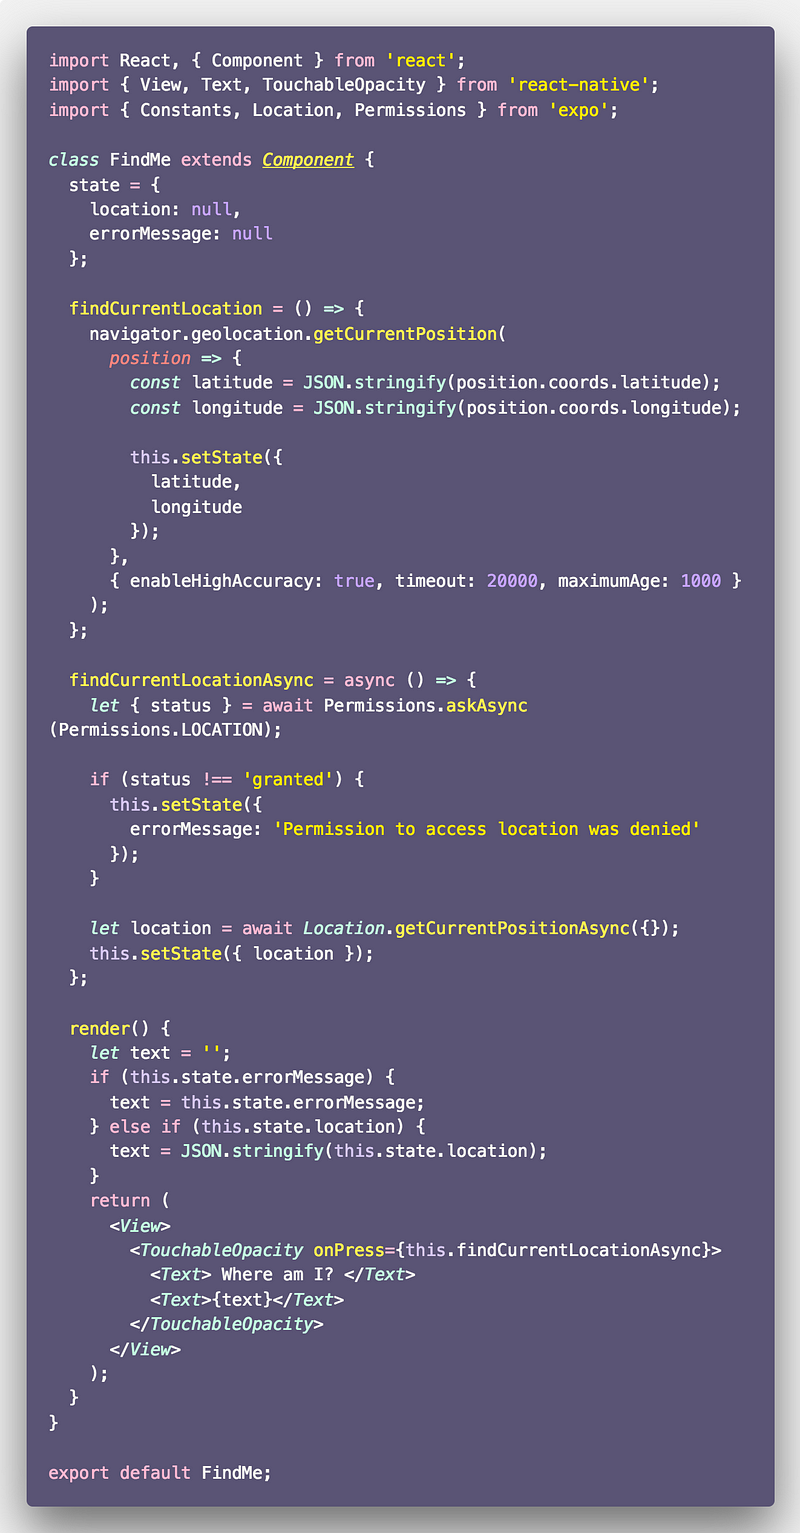
We change our state a bit. It will not store the whole geolocation object and errorMessage in case of an error. Our findCurrentLocation remains the same. In fact, we are not using it. Expo has a method for us that does the same. It is called getCurrentPositionAsync. It will only fetch the user's location and other properties made available by getCurrentPosition method from Geolocation API and if the permission is granted. In the render method, onPress prop is now calling a different method findCurrentLocationAsync that holds the logic for asking permission and fetches the location data after the user has granted permission to our app to access it. If not, the error message is set otherwise the location in the state is updated.
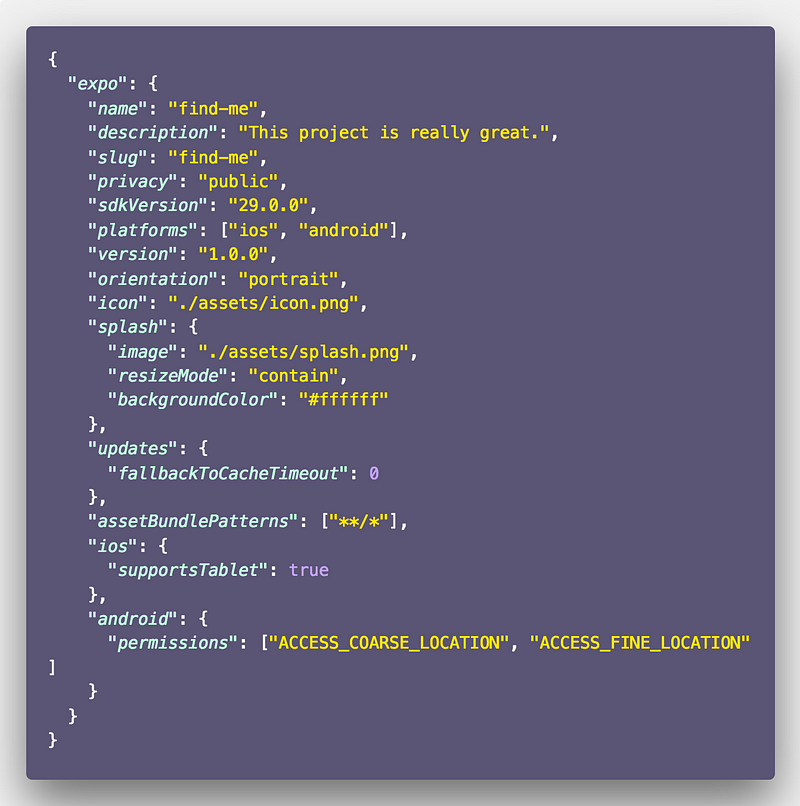
The last step is for android users. Open app.json and permissions.
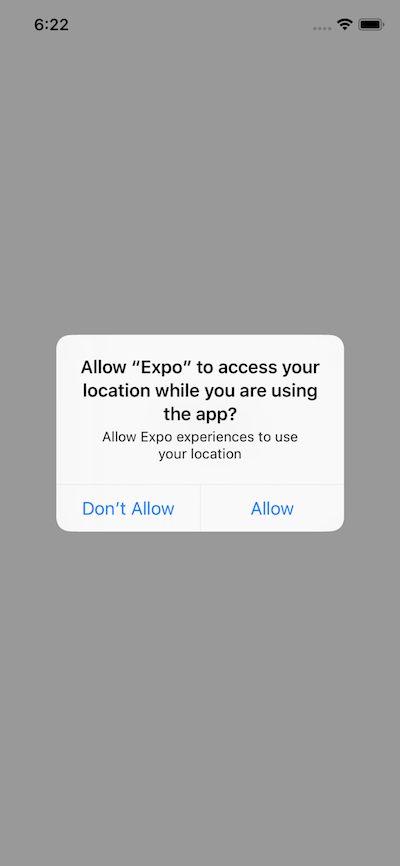
If you press allow, you will see the following result.
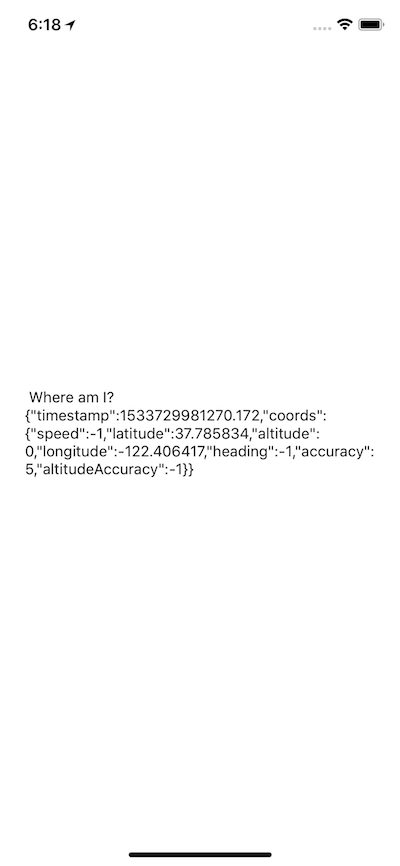
Note that in even in development mode and running the app in a simulator, the permissions are only asked once. To perform this again, you will have to delete the app from your simulator and re-run the command to start the expo app.
You can find the complete code in this Github repository.👇
amandeepmittal/find-me
_⚛️ + 📱 Location + Permissions in Expo app. Contribute to amandeepmittal/find-me development by creating an account on…_github.com
Using react-native-cli
Using react-native-cli means you will have to set permissions on your own, however, the logic of getting a user's location is going to be the same.
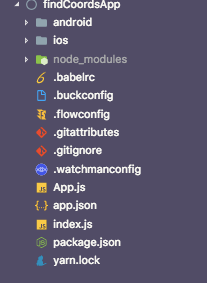
There are no templates in react-native-cli so once the directory is generated, traverse into it and run npm start to see if everything is installed correctly. The first thing you will notice when you open this project in an IDE or a code editor is that there is a vast amount of change in the structure of files and folders. Expo had a sort of minimal project structure as compared to this one. There are separate build folders such as /android and /ios for each platform. You can also use flow (which is similar to TypeScript, open sourced by Facebook).
We will only modify App.js file with the following code.
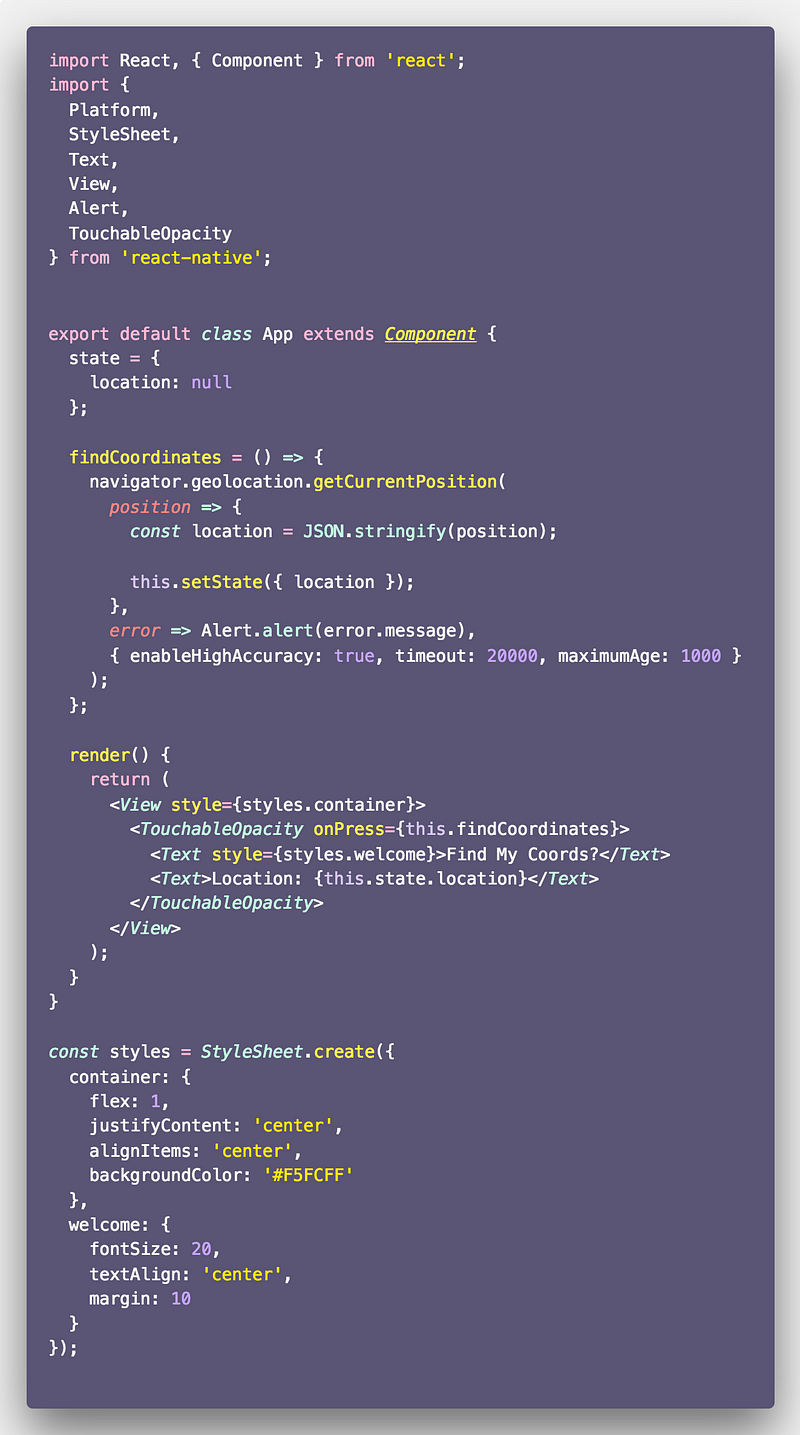
Observe that findCoordinates works the same way as in Expo application and also the code in render() function is exactly same. Our next step is to set permissions.
In ios, geolocation is enabled by default when a project is created using react-native-cli. To use it, we just need to include a key in info.plist which is inside the ios/findCoordsApp directory.
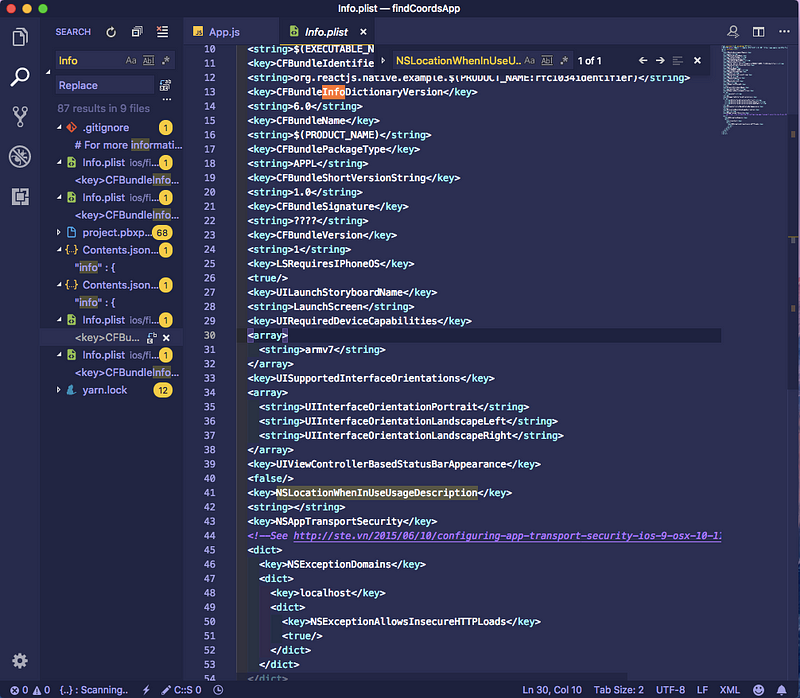
For android, we need to add the following line in android/app/src/AndroidManifest.xml file.
<uses-permission android:name="android.permission.ACCESS_FINE_LOCATION" />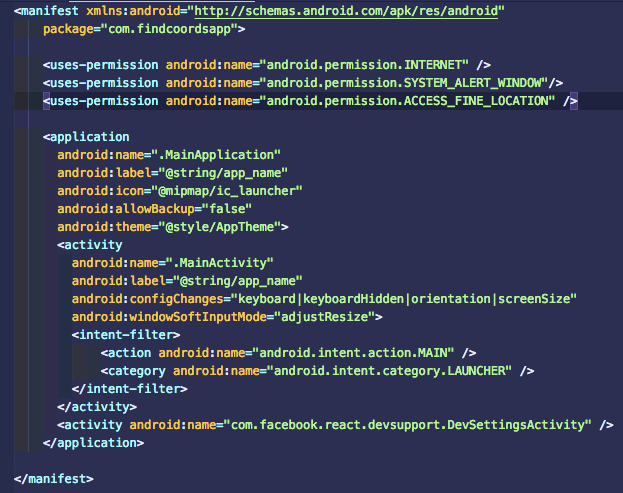
Now if you run your application you will see the following screen.
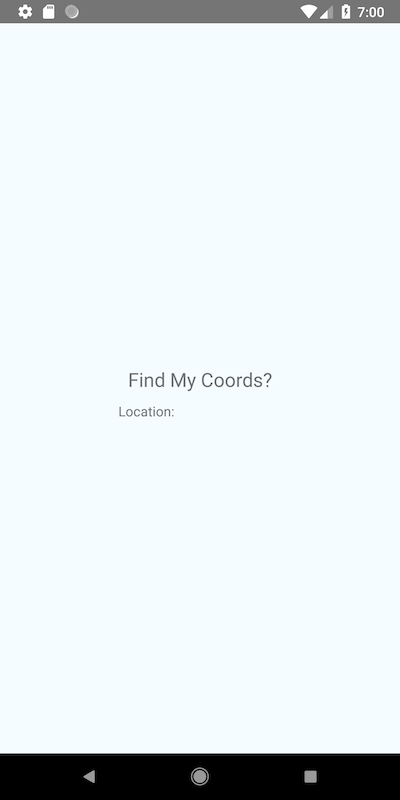
Click on the text and you will be prompted to ask whether to allow the application to request for user’s location or not. For the demonstration purpose, I am using an android Emulator since we have already seen how it works on ios Simulator in the Expo section.
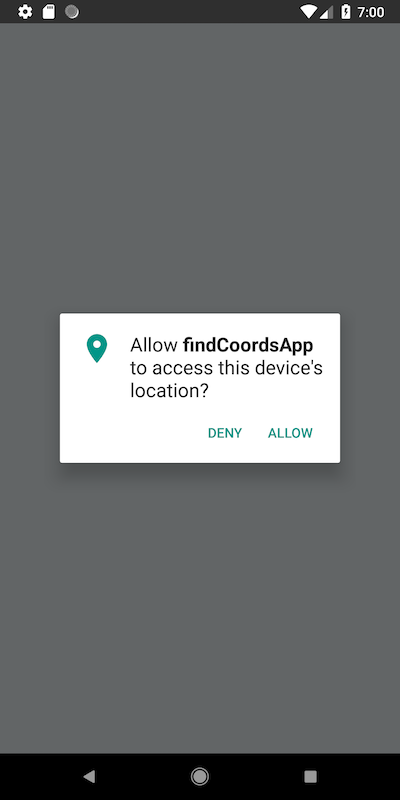
If you press allow, you will see the following result.

You can find the complete code in this Github repository. 👇
If you want to learn more about working with Geolocation API in a React Native application, please go through the official documentation.
Expo’s Documentation has a lot more on Permissions too.